You can now set your client facing emails sent from the system to display your own email address in the ‘From:’ field instead of noreply@newton.ca
We had many requests for this and we just wanted to let you know that we heard you, and we’re here to deliver.
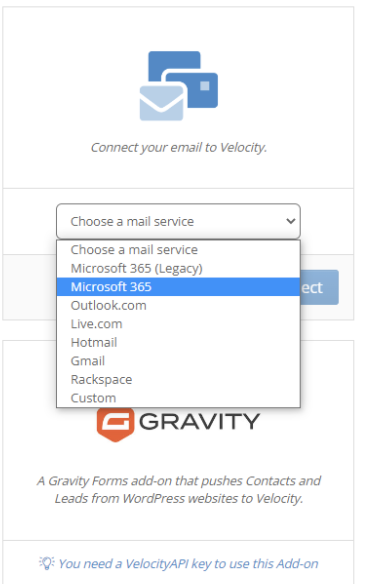
Which Email Server Do You Use?
Microsoft 365
There is now a new interface for you to connect your 365 Email Plugin.
From the dropdown select Microsoft 365.
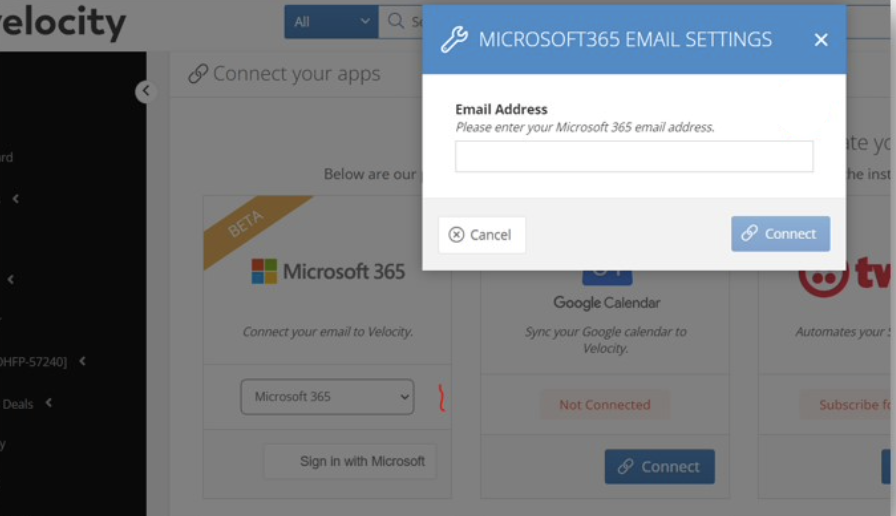
To connect your new 365 email plugin, you will enter your email address, by following the steps on screen, and clicking connect.
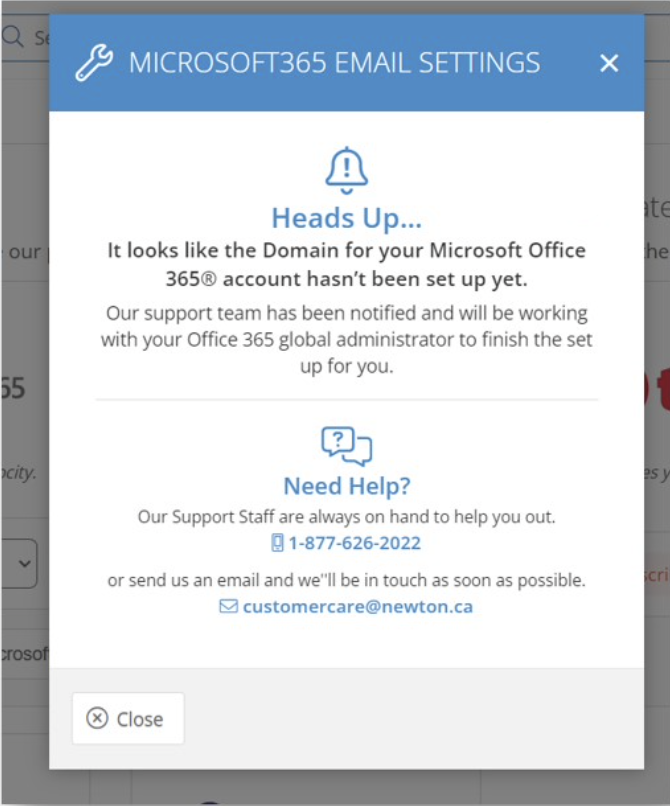
You will get a pop-up letting you know that Customer Care team will create your domain by working with your office 365 administrator to finish the setup.
Rackspace (DLC)
DLC Agents should use Rackspace to connect to their DLC email.
MA
MA Agents should choose Custom from the drop down menu, and then enter the following
- SMTP: mail.mortgagecentre.com / mail.mortgagearchitects.ca
- Security: SSL
- Port: 465
- Username: your email address
MA users: Please make sure to use @mortgagearchitects.ca (not @mtgarc.ca) for your email address
Other Email Servers
You will need to enter your Outgoing Mail (SMTP) Server, Security and Port #. Find your email server on the list below and copy the information.
EMAIL SETTINGS BY SERVER
| Outgoing Mail (SMTP) Server | Security | Port | |
|---|---|---|---|
| Yahoo | smtp.mail.yahoo.com | SSL | 465 |
| iCloud | smtp.mail.me.com. | SSL | 587 |
| AOL | smtp.aol.com | SSL | 465 |
| Gmail** | smtp.gmail.com | None | 587 |
| Hotmail/Outlook (Microsoft 365)* | Choose Microsoft 365 from the drop down | ||
| DLC (Rackspace) | Choose Rackspace from the drop down | ||
| MA (Custom) | Choose Custom > mail.mortgagearchitects.ca | SSL | 465 |

After you’ve entered everything click Test Connection. If you get a successful connection notice click Send Test Email. Once everything has gone through you can click Save Settings. You’re good to go!
**GMAIL SPECIAL INSTRUCTIONS
You have two options in your Gmail Settings to make it compatible with the Velocity email plug in. Choose the one that suits you best!
OPTION 1
2 Factor Authentication turned OFF (This is when it prompts you to enter your phone number and receive a code via text message when you go to login which adds an extra layer of security)
Two settings must be as follows in order for this to work
- TURN ON “Allow less secure apps”
- TURN OFF “2 Factor Authentication” (it’s turned off by default, so unless you turned it on, don’t worry about it)
OR
OPTION 2
2 Factor Authentication turned ON (This is when it prompts you to enter your phone number and receive a code via text message when you go to login which adds an extra layer of security)
- TURN OFF “Allow less secure apps” (it’s turned off by default, so unless you turned it on, don’t worry about it)
- TURN ON “2 Factor Authentication”
- CREATE A “Gmail App Password” (An App Password is a 16-digit passcode that gives a non-Google app or device permission to access your Google Account. App Passwords can only be used with accounts that have 2-Step Verification turned on.)
Whether you use #1 or #2, your email settings information is as follows.
Outgoing Mail (SMTP) Server: smtp.gmail.com
Security: None
Port: 587